
Using GitHub Actions to automatically build your game and upload it to Steam
2348 words, 9 min read
Contents:
Hello, my name is ThatFirey and today we'll set up automatic building and uploading to Steam, from just a couple of clicks, not requiring you to build the game from GameMaker or prepare it through SteamCMD.
Initial repository set-up
First of all we'll need a repository on GitHub, it can be a private or a public one depending on if you want others to access your code
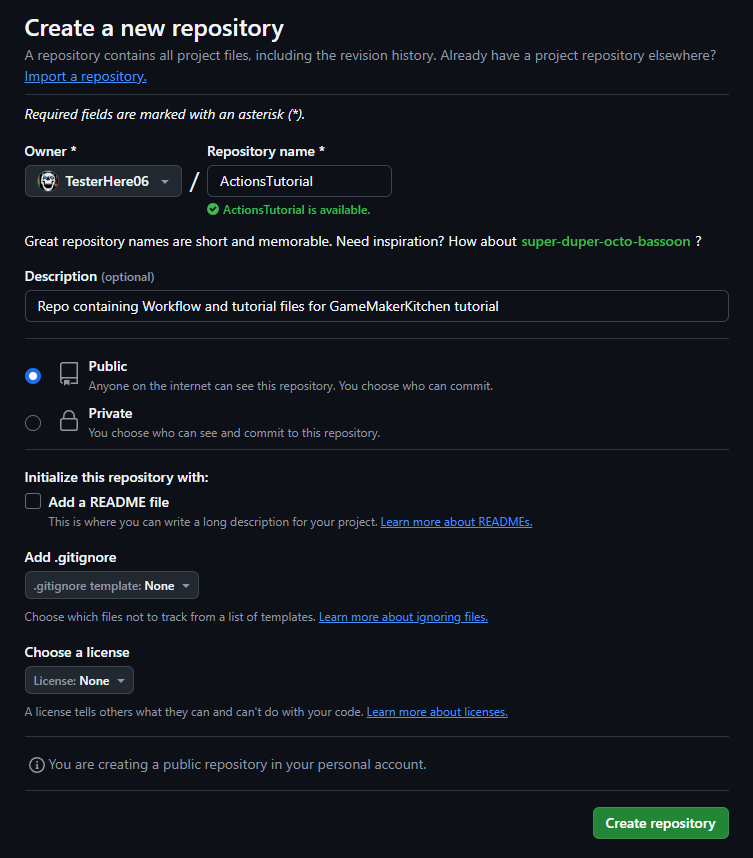
Once created you now have to use a Git client to clone the repository on your machine. If you prefer ease of usage without command lines it's recommended to use GitHub Desktop on which the tutorial will be shown.
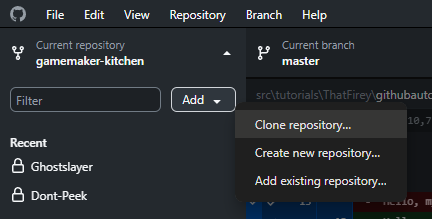
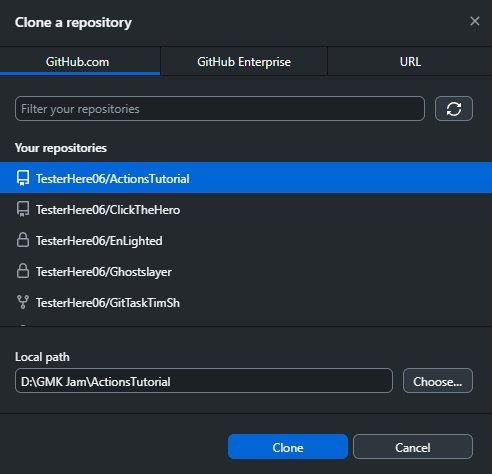
Next after downloading and launching it, you have to login with your GitHub account and clone the repository you created. After that we will need to create or save the GameMaker project in the cloned folder.

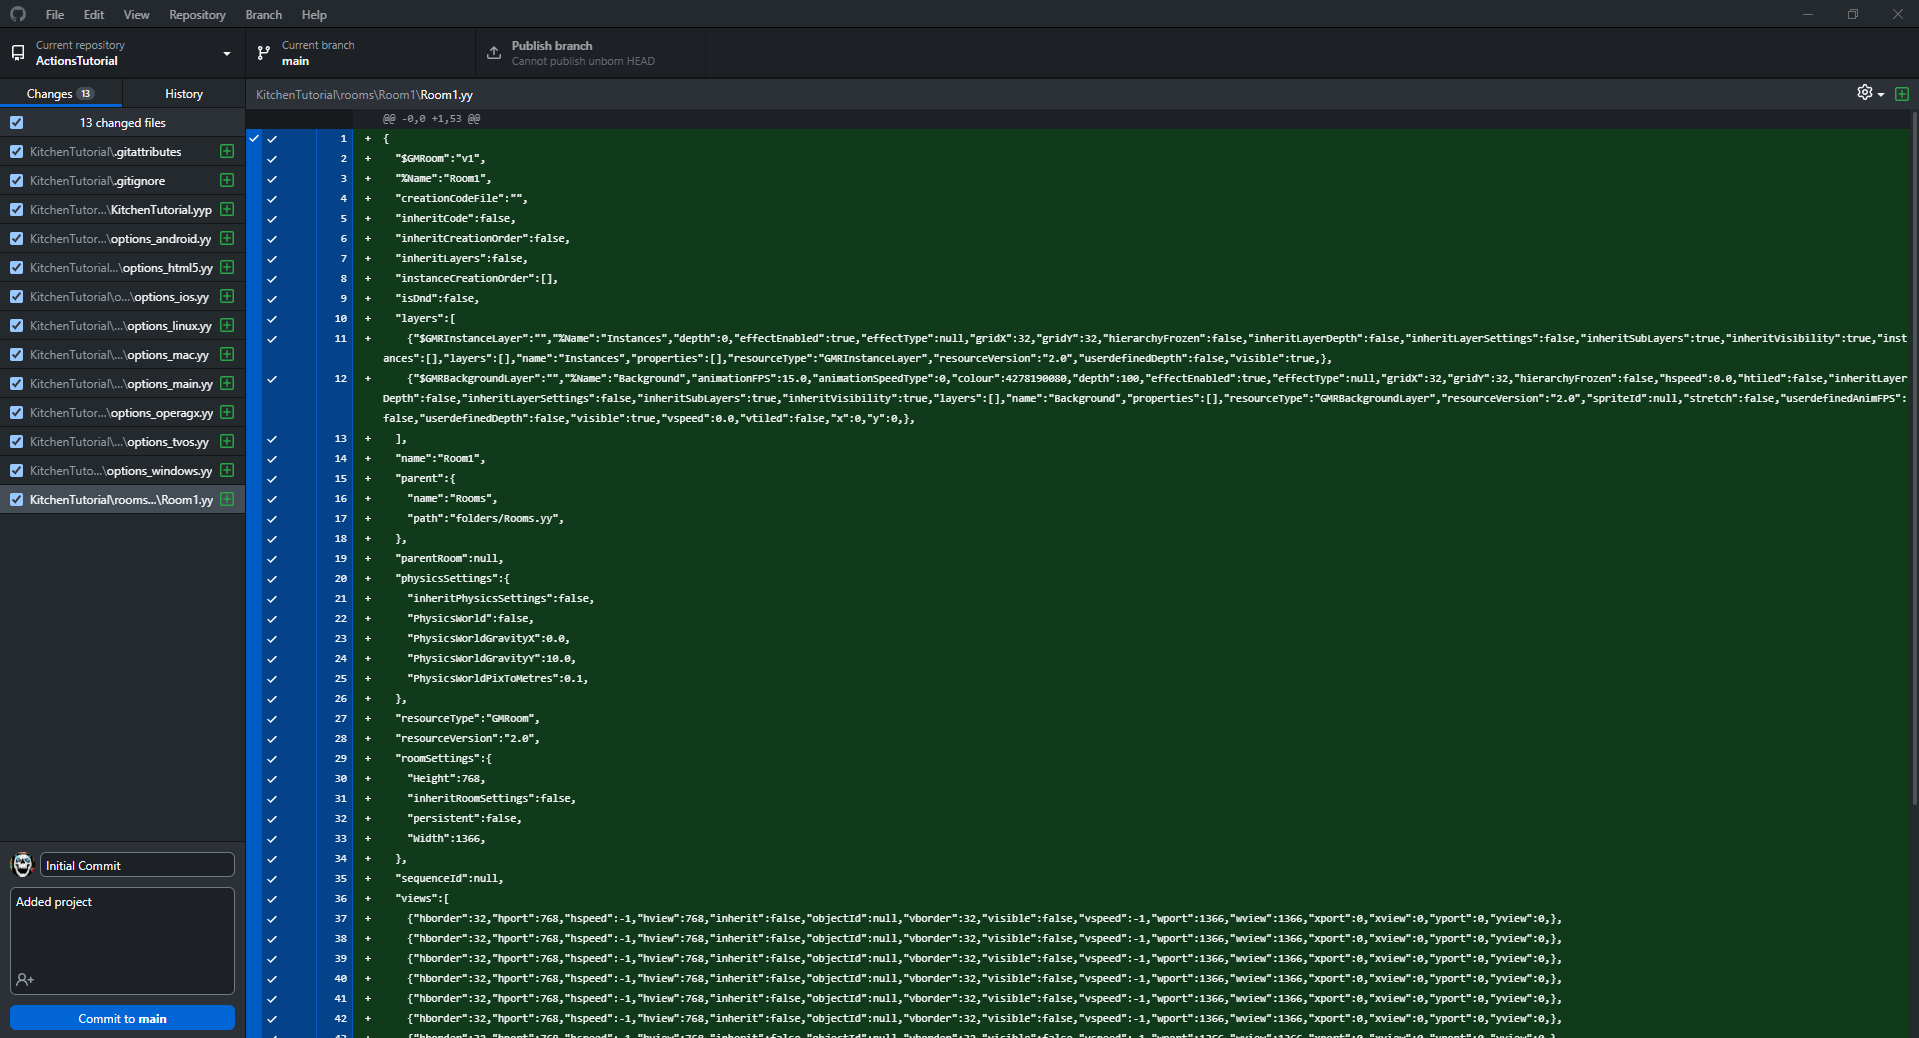
After adding a project into cloned folder, GitHub Desktop will now track all changes done in GameMaker and overall in the project. You can commit and push your changes to GitHub's server and they will reflect in the repository.
GitHub Actions Introduction
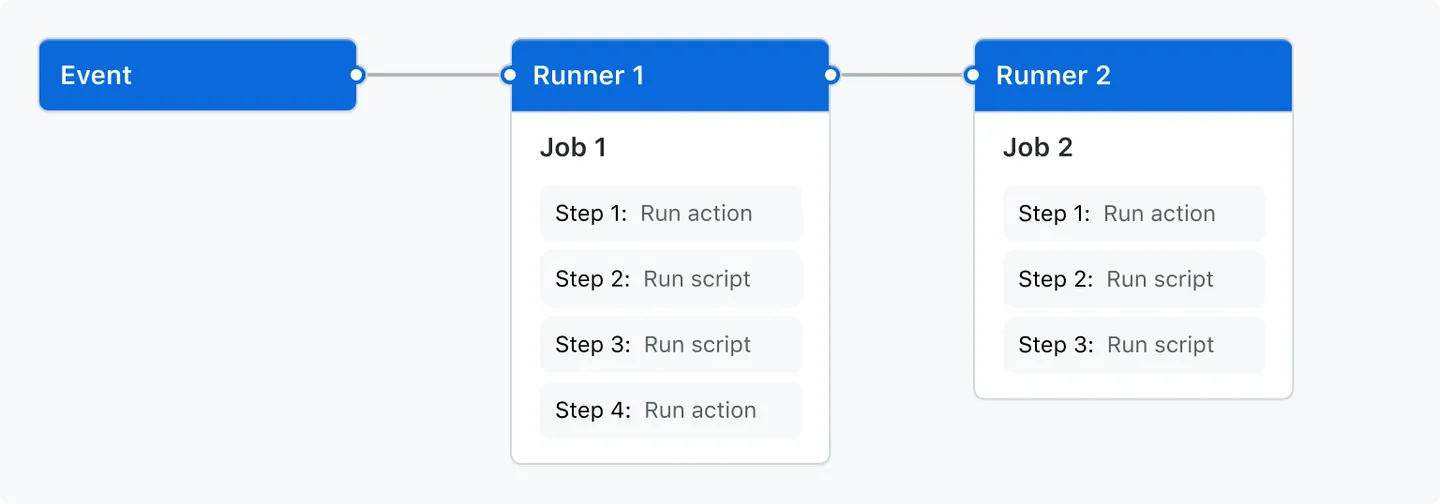
Now that we have our repository set-up we can get into the automatization of our processes and GitHub Actions allows just that. You are able to use GitHub's virtual machines to do actions that you would usually have to do manually, but instead automizing it to the point of being able to immideately update your Steam version from just a press of a button on GitHub.
Each action is done through Workflow files, which lists when the action has to start, what the action has to do and other infortmation.
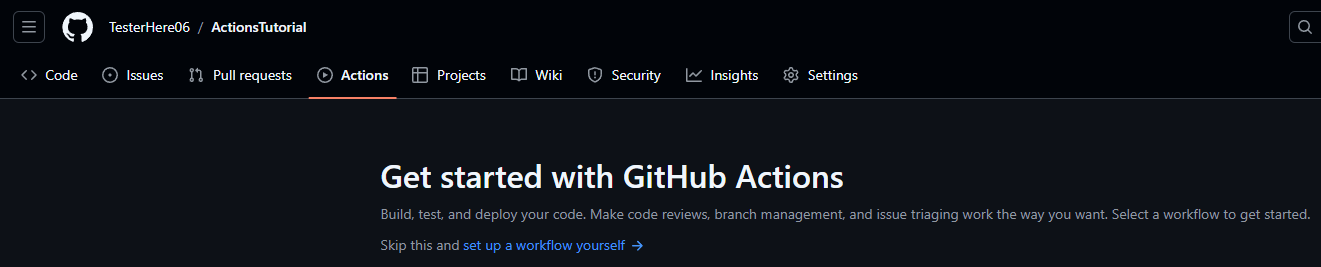
To start, go to Actions tab on your repository's GitHub page and press "Set up a workflow yourself". You'll be met with an editable file window, that's where we'll write out the jobs to do for automatic building, but first let's understand how it works
The workflow file first starts with the name of the action that it's doing so type
name: Automatic GameMaker Build
Next we describe when we want this action to trigger. For that we write "on:" and next describe when this action is ran. In this example this action will be ran on each push you do to the repository with the "push:", you will also be able to manually start the action from GitHub Actions page using "workflow_dispatch" and run the workflow from another one using "workflow_call"
on:
	push:
	workflow_dispatch:
	workflow_call:
You can read more about events that trigger workflows here: https://docs.github.com/en/actions/writing-workflows/choosing-when-your-workflow-runs/events-that-trigger-workflows
Next is the most important part of our workflow file, it's the jobs that the Action does whenever it's called and now here comes the time for us to create the building job for our game
Building the game through jobs
To describe a step of the job first we need to point to what it uses for it's backend code, luckly there's a full GitHub Actions Marketplace showing tons of differemt avaliable actions to use that you can check out over here: https://github.com/marketplace?type=actions
But right now we require these three actions: igor-setup, igor-build both made by shichen85, checkout and upload-artifact We'll get to what each one of them does in a moment, first let's start with checkout, which allows the actions to check the repository out for all of it's files.
name: Automatic Build On Push
on:
  push:
  workflow_dispatch:
  workflow_call:
jobs:
  build:
    runs-on: windows-2022
    steps:
      - uses: actions/checkout@v4
        with:
          lfs: true
First step done - Action checked out the project, now the second step is locating the yyp file of your GameMaker project to build, this does not require a marketplace action and can be run through the command line
name: Automatic Build On Push
on:
  push:
  workflow_dispatch:
  workflow_call:
jobs:
  build:
    runs-on: windows-2022
    steps:
      - uses: actions/checkout@v4
        with:
          lfs: true
      - id: find_yyp
        name: Find the yyp file
        run: |
          $yyp = Get-ChildItem -Path ${{ github.workspace }} -Recurse -Filter *.yyp
          Write-Output "YYP file found at: $yyp"
          "yyp-path=$yyp" | Out-File -FilePath $env:GITHUB_OUTPUT -Append
Running this will automatically find the path to your yyp file and save it to the variable steps.find_yyp.outputs.yyp-path, now we can get to actually building our project using Igor Setup and Igor Build actions
name: Automatic Build On Push
on:
  push:
  workflow_dispatch:
  workflow_call:
jobs:
  build:
    runs-on: windows-2022
    steps:
      - uses: actions/checkout@v4
        with:
          lfs: true
      - id: find_yyp
        name: Find the yyp file
        run: |
          $yyp = Get-ChildItem -Path ${{ github.workspace }} -Recurse -Filter *.yyp
          Write-Output "YYP file found at: $yyp"
          "yyp-path=$yyp" | Out-File -FilePath $env:GITHUB_OUTPUT -Append
      - name: use Igor Setup
        uses: bscotch/igor-setup@v1
        id: igor
        with:
          target-yyp: ${{ steps.find_yyp.outputs.yyp-path }}
          access-key: ${{ secrets.ACCESS_KEY }}
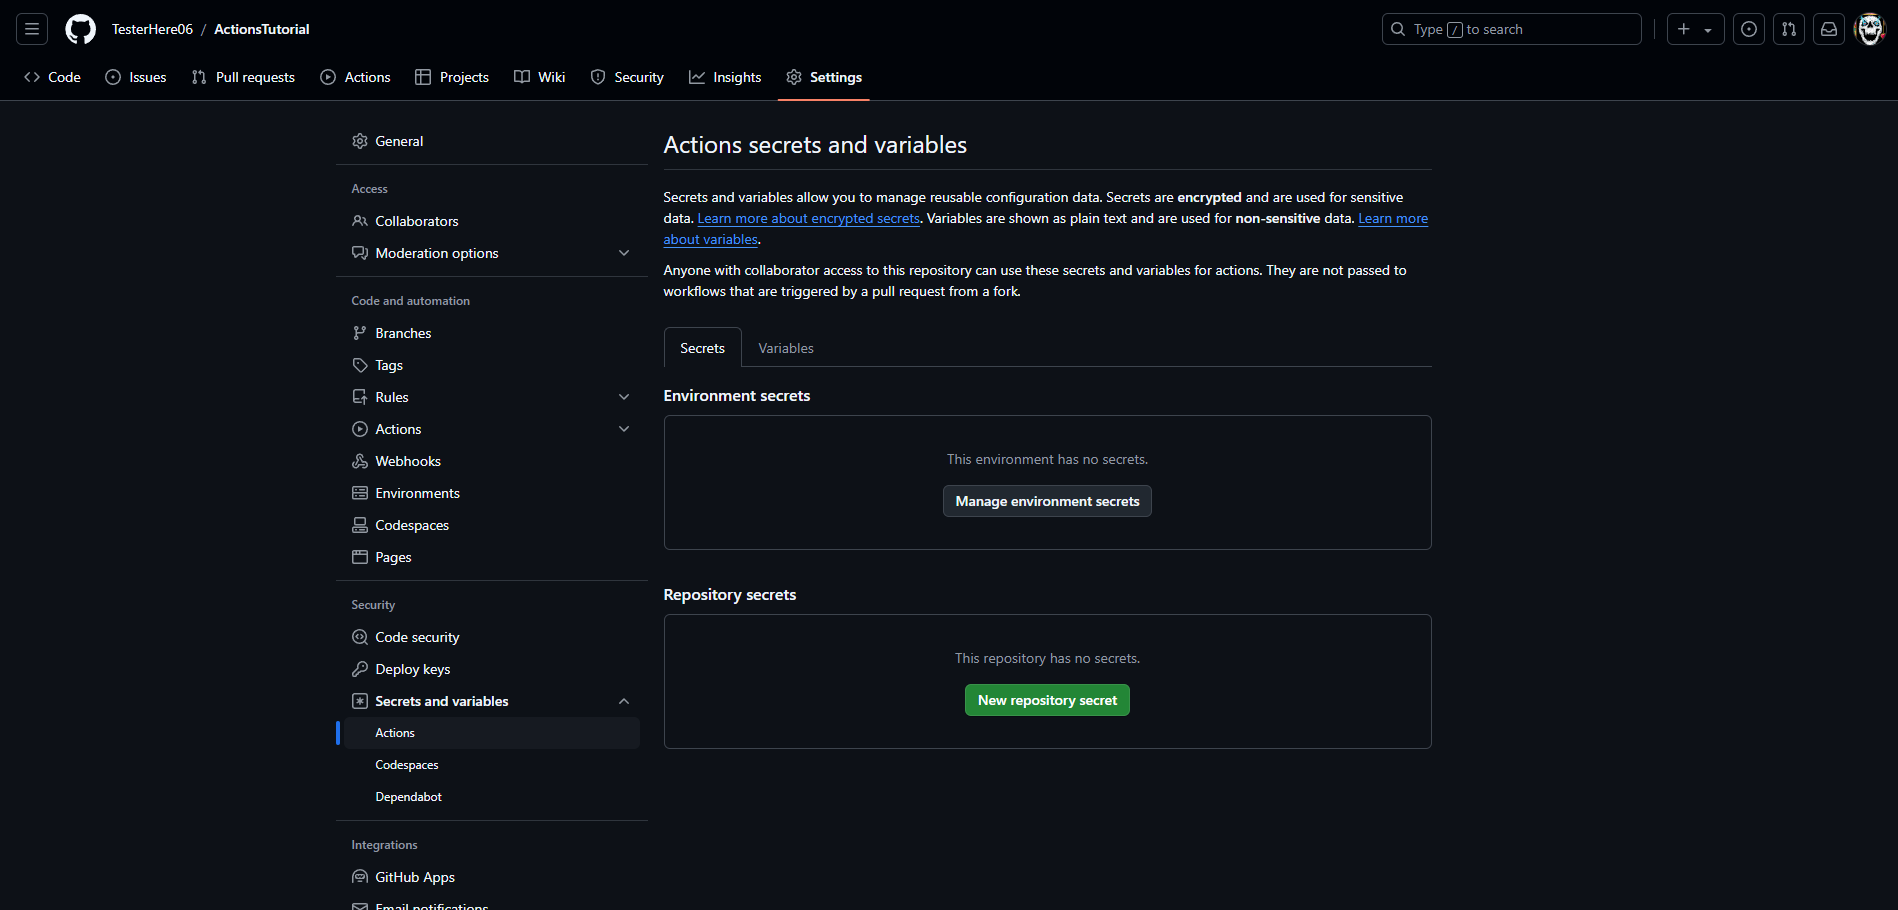
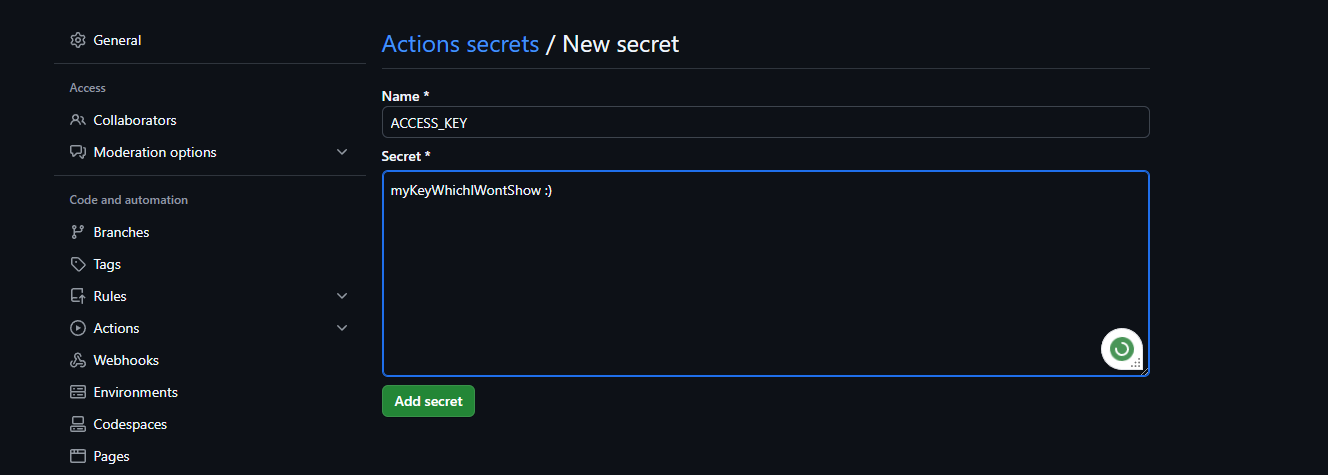
Igor is a GameMaker command line tool to allow building games without using the IDE, since GitHub can't just download the entire GameMaker's IDE, we do the building through the Igor tool. However to use it we need to acquire your GameMaker account's acces key which you can request here: https://gamemaker.io/account/access_keys
You'll need to add the access key as a secret in your repository's settings under name of ACCESS_KEY
Now, time to actually build the game using the set-up Igor
name: Automatic Build On Push
on:
  push:
  workflow_dispatch:
  workflow_call:
jobs:
  build:
    runs-on: windows-2022
    steps:
      - uses: actions/checkout@v4
        with:
          lfs: true
      - id: find_yyp
        name: Find the yyp file
        run: |
          $yyp = Get-ChildItem -Path ${{ github.workspace }} -Recurse -Filter *.yyp
          Write-Output "YYP file found at: $yyp"
          "yyp-path=$yyp" | Out-File -FilePath $env:GITHUB_OUTPUT -Append
      - name: use Igor Setup
        uses: bscotch/igor-setup@v1
        id: igor
        with:
          target-yyp: ${{ steps.find_yyp.outputs.yyp-path }}
          access-key: ${{ secrets.ACCESS_KEY }}
      - name: use Igor Build
        uses: bscotch/igor-build@v1
        id: build
        with:
          yyc: false
          yyp-path: ${{ steps.find_yyp.outputs.yyp-path }}
          user-dir: ${{ steps.igor.outputs.user-dir }}
Igor Build runs the set-up Igor command line and builds the game as your GameMaker IDE normally would
If you encounter any errors during these steps, you will need to make sure your .yyp file is uploaded to the repository and that you have correctly added the Access Key of your GameMaker account. You could also checkout each action's settings, for example igor-setup has additional setting of "runtime-version: " which could be sometimes required for some older runtime versions. You can read more about each setting on each action's marketplace page
Next step we now need to upload the built file into the artifact. Artifact is a file or collection of files produced during a workflow run, which allows it to be downloaded by the user or used in another workflow (Which we'll use for uploading to Steam)
name: Automatic Build On Push
on:
  push:
  workflow_dispatch:
  workflow_call:
jobs:
  build:
    runs-on: windows-2022
    steps:
      - uses: actions/checkout@v4
        with:
          lfs: true
      - id: find_yyp
        name: Find the yyp file
        run: |
          $yyp = Get-ChildItem -Path ${{ github.workspace }} -Recurse -Filter *.yyp
          Write-Output "YYP file found at: $yyp"
          "yyp-path=$yyp" | Out-File -FilePath $env:GITHUB_OUTPUT -Append
      - name: use Igor Setup
        uses: bscotch/igor-setup@v1
        id: igor
        with:
          target-yyp: ${{ steps.find_yyp.outputs.yyp-path }}
          access-key: ${{ secrets.ACCESS_KEY }}
      - name: use Igor Build
        uses: bscotch/igor-build@v1
        id: build
        with:
          yyc: false
          yyp-path: ${{ steps.find_yyp.outputs.yyp-path }}
          user-dir: ${{ steps.igor.outputs.user-dir }}
      - name: upload-build
        uses: actions/upload-artifact@v4
        with:
          name: igor-build-windows
          path: ${{ steps.build.outputs.out-dir }}
          retention-days: 1
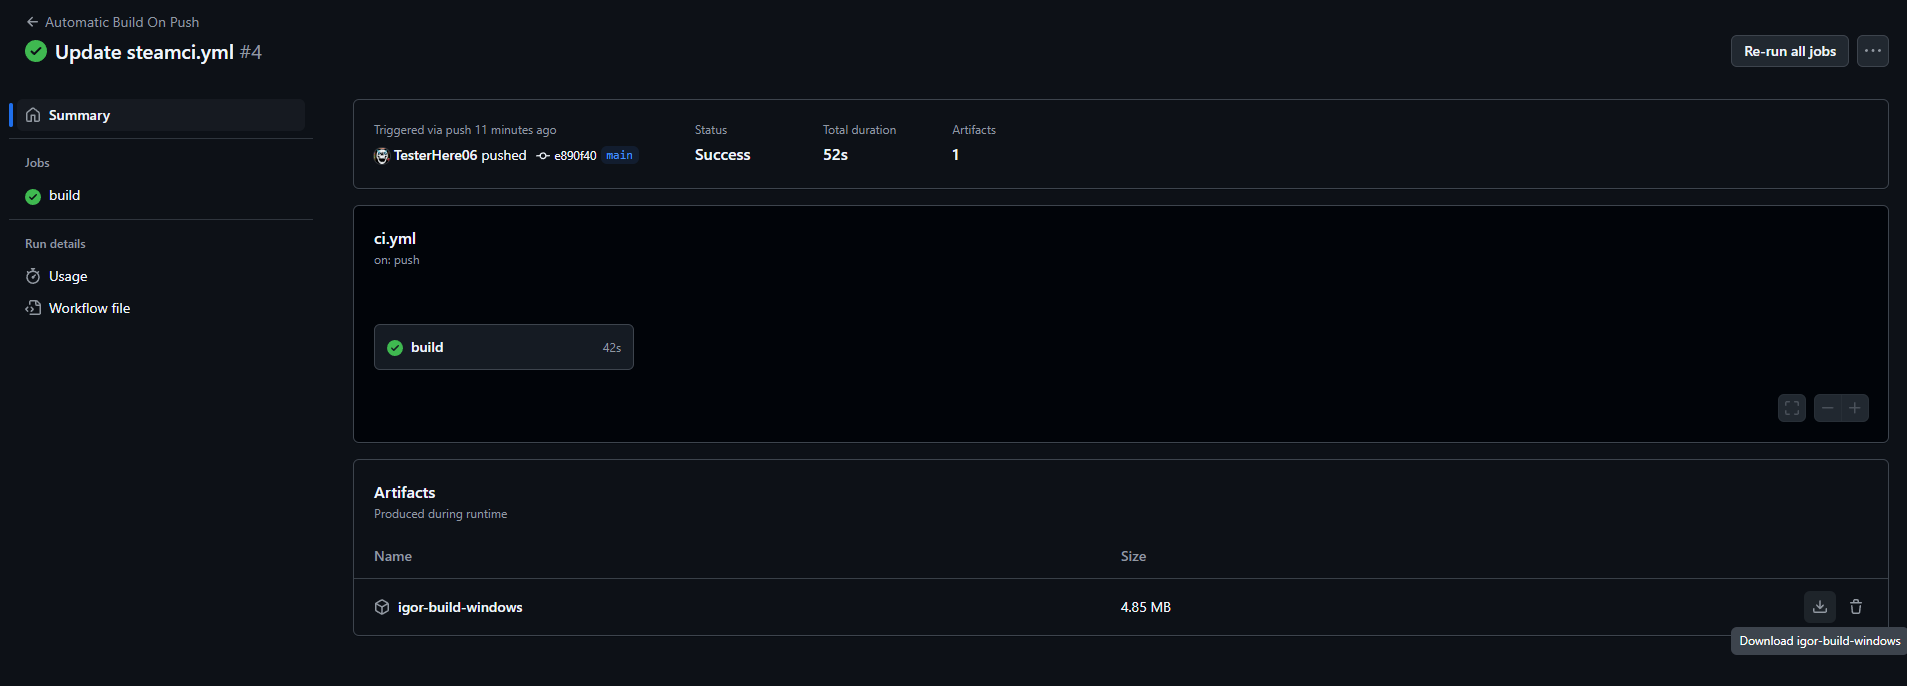
And there we have it! Our full working workflow file to build the game, you can test it out for yourself now by making a push after making any sort of change in your game, pushing it to GitHub and checking the Actions page on your repository, after it finished the process of the action, you can click on it and download the made artifact, aka your build.
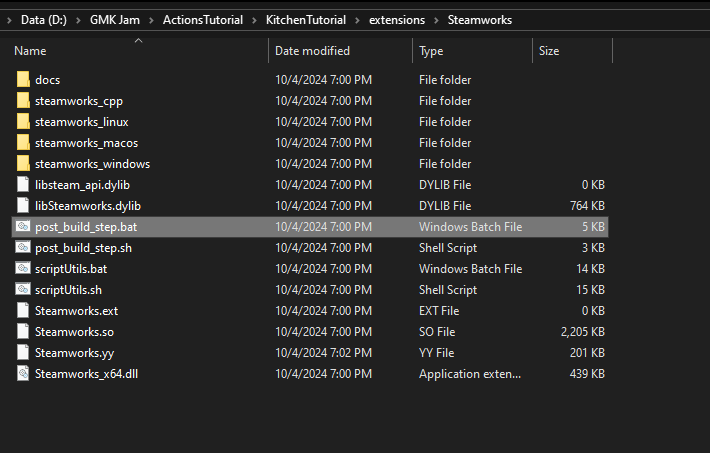
There's one more fix you have to do however if you are using the Steamworks extension. Make sure to remove the post_build_step.bat file from your project's Steamworks' extension folder. So, extensions\steamworks\post_build_step.bat
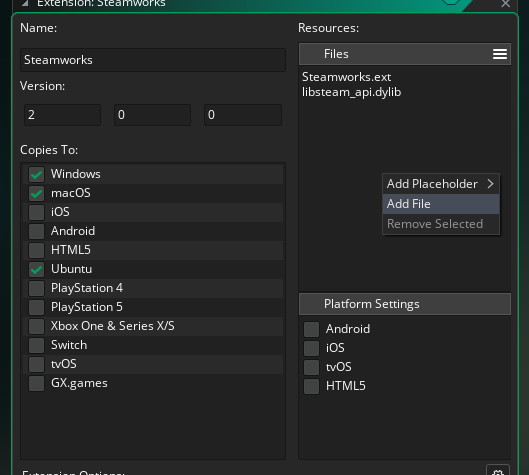
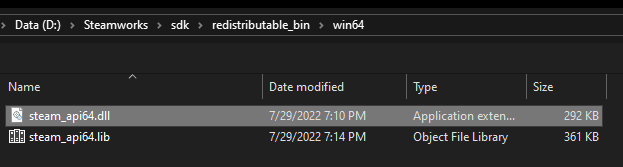
And instead to keep the Steamworks integration, you will need to navigate to your SDK's path redistributable_bin, win64 folder and add the steam_api64.dll to your project's Steamworks extension
The next section will be showing how to upload your game to Steam right after building the game, so if you just needed a build of your game, that's all for this tutorial, thanks for checking it out! And for those who stay for more...
Automatically uploading the build to Steamworks
Note: You can only do this if you have your own Steamworks Game
Uploading to Steam will have to be done in a separate workflow file, but it also has to run right after the building workflow, as it needs to download the build artifact from it, so our "on: " will have to be like this:
name: Steam Deploy
on:
  workflow_call:
  workflow_run:
    workflows: ['Automatic Build On Push']
    types: [completed]
permissions:
   actions: read
This workflow will also require extra actions permission to be able to use the other workflow's artifact. Now let's start with writing out the jobs for the workflow, first we'll use download-artifact action to download the artifact from the completed build job.
name: Steam Deploy
on:
  workflow_call:
  workflow_run:
    workflows: ['Automatic Build On Push']
    types: [completed]
permissions:
   actions: read
jobs:
  deploy:
    runs-on: ubuntu-latest
    steps:
      - name: Download all workflow run artifacts
        uses: actions/download-artifact@v4
        with:
          name: igor-build-windows
          path: downloads/igor-build-windows.zip
          run-id: ${{ github.event.workflow_run.id }}
          github-token: ${{ secrets.GITHUB_TOKEN }}
Note: The "secrets.GITHUB_TOKEN" doesn't need to be set up in repository's settings as it already requests the token automatically from your profile with set permissions that we wrote in the beginning.
Next, we unpack the downloaded archive
name: Steam Deploy
on:
  workflow_call:
  workflow_run:
    workflows: ['Automatic Build On Push']
    types: [completed]
permissions:
   actions: read
jobs:
  deploy:
    runs-on: ubuntu-latest
    steps:
      - name: Download all workflow run artifacts
        uses: actions/download-artifact@v4
        with:
          name: igor-build-windows
          path: downloads/igor-build-windows.zip
          run-id: ${{ github.event.workflow_run.id }}
          github-token: ${{ secrets.GITHUB_TOKEN }}
      - name: Extract archives
        run: |
          7za x -y downloads/igor-build-windows.zip -owin/
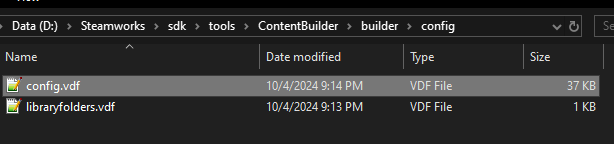
And for the last job we'll be using steam-deploy Action by game-ci, but before that we need to aquire config.vdf file from SteamCMD to allow GitHub to automatically log into your account without MFA (Multi-Factor Authentication), you can find it inside your Steamworks SDK folder "sdk\tools\ContentBuilder/builder" Launch steamcmd.exe and type "login username password", it will also request your Steam Guard code if you have it enabled. Once you successfuly logged in, you can close steamcmd.exe and in the same folder there should now be the config folder, inside which you will find the config.vdf. Open the file in notepad or any other text editor and copy all the contents inside it, we now need to encode that data into Base64 format, you can use command "cat config/config.vdf | base64 > config_base64.txt" if you're using Linux or Linux subsystem for Windows. Or you can use online tools to encode that data into Base64, bot variants work.
Copy the generated base64 code and create two new secrets. "STEAM_USERNAME" - containing your steam login username. And "STEAM_CONFIG_VDF" - with pasted in base64 code. And now we finally add the Steam deploy action
name: Steam Deploy
on:
  workflow_call:
  workflow_run:
    workflows: ['Automatic Build On Push']
    types: [completed]
permissions:
   actions: read
jobs:
  deploy:
    runs-on: ubuntu-latest
    steps:
      - name: Download all workflow run artifacts
        uses: actions/download-artifact@v4
        with:
          name: igor-build-windows
          path: downloads/igor-build-windows.zip
          run-id: ${{ github.event.workflow_run.id }}
          github-token: ${{ secrets.GITHUB_TOKEN }}
      - name: Extract archives
        run: |
          7za x -y downloads/igor-build-windows.zip -owin/
      - name: Upload to Steam
        uses: game-ci/steam-deploy@v3.0.4
        with:
          username: ${{ secrets.STEAM_USERNAME }}
          configVdf: ${{ secrets.STEAM_CONFIG_VDF}}
          appId: YourAppIdHere
          buildDescription: Build sent automatically by Github Actions
          depot1Path: win
          releaseBranch: prerelease
You will need to add your own app's ID to the appID setting, as well as the branch that the build will be sent to (it's recommended to use any other branch than default, as the sent built is published automatically), you can also change the build description that is used, as well as a few other specific settings that you can read about on steam-deploy's page.
And congrats, you have now set up automatic building and publishing to Steam, saving yourself plentiful of time with just a press of the Push button. Thank you for checking out the tutorial and good luck on game-making! ^^
Big thank you to TabularElf for helping me understand deploying things with GitHub Actions and Ross Manthorp for their tutorial on GitHub Actions with GameMaker which you can read over here: https://gamemaker.io/en/blog/bs-tech-automate-builds