10 Levels of Platformer Jumping
5724 words, 21 min read
Contents:
Platformers are one of the first genres that game developers attempt to make. Yet jumping - arguably the defining feature of platformers - is not the most straightforward feature to implement.
In this tutorial, I'll go through 10 levels of platformer jumps (with full code) from simple to complex in order to help you level up your platformers. This format will ease you into the technical side of the jump mechanic but it will also help you consider the design side.
A more complex jump is not inherently a better jump. Any of these levels of complexity could be suitable for your game and I hope you'll be able to mix and match some of these concepts to create your perfect jump.
This tutorial was developed on v2024.8 of GameMaker but the code will work on all recent versions. The concepts are also applicable to other programming languages and game engines.
I've made a demo which features all 10 levels. You can try it below or CTRL-click the itch.io logo in the bottom-left, open it in a new tab, and then try each level before you code it. Arrow keys to move, Z to go forward a level, and X to go back.
You can download the source code for the project for free from this GitHub repo.
0. GameMaker setup

Once you've opened GameMaker and created a new blank project, the first task is to create three sprites.

Right-click the 'Sprites' folder inside of the 'Asset Browser' and select 'Sprite' from the 'Create' sub-menu.
You can also press 'Alt-S' to make a sprite.
The sprites should be called something like 'spr_player', 'spr_wall', and 'spr_bounce'.

For the player, I'm going to import two frames from Kenney's Pixel Vehicle Pack (download below by right-clicking and saving) and then I'll set the FPS of the animation to 4 frames-per-second.


For the wall, make each a 32x32 black square. For the bounce pad, a 32x16 lime-green square.
Then, create four objects called 'obj_player', obj_collision', 'obj_wall', and 'obj_bounce'. Open the player object and click the 'No Sprite' dropdown button and select the corresponding player sprite. Do this for 'obj_wall' and 'obj_bounce' as well.

Open 'obj_collision' and don't give it a sprite but do click the 'Parent' button and drag 'obj_wall' and 'obj_bounce' from the 'Asset Browser' into the 'Children Area'. This means that we can check for collisions with 'obj_collision' and GameMaker will also check for collisions with 'obj_wall' and 'obj_bounce'.
Next, create a room. The details are arbitrary but I named it 'rm_test' and set the dimensions to 512x288. Now you can design a small test level. Something like the below image will allow us to test all of the features.

The final step is to add some code events to the player object which we'll be using often.
Open the player object and click the 'Add Event' button, then select 'Create'. Do this again and select 'Step' from the 'Step' sub-menu. In the 'Create' event, we need to write this code:
/// @desc Variables

move = 0; // Direction of horizontal movement
spd = 3;  // Maximum horizontal speed
hsp = 0;  // Current horizontal velocity
These variables will be used for every level of our jump.
Then in the 'Step' event, write this code:
/// @desc Movement

// Input

var _right = keyboard_check(vk_right);
var _left = keyboard_check(vk_left);

move = _right - _left;

if !place_meeting(x, y + 1, obj_collision) image_index = 1;
else if move == 0 image_index = 0;

hsp = lerp(hsp, move * spd, 0.25);
The above code will not change between our different levels so I won't write it out again but make sure it stays at the top of your 'Step' event. Our horizontal collision code will look like this so just write it out below the above code:
if place_meeting(x + hsp, y, obj_collision)
{
    while !place_meeting(x + sign(hsp), y, obj_collision)
    {
        x += sign(hsp);
    }
    hsp = 0;
}
x += hsp;
This is the base code I'm using for my horizontal movement and collisions. You can either copy this or, if you have another collision system you prefer, adapt the rest of this tutorial's code to work with that.
If you run the game at this point, you only have horizontal movement and collision and no jumping.
From now on, as I show you how to add and change the code in these events, in order to make it obvious what has changed, code that didn't change will get commented out but that doesn't mean you need to comment out the code.
1. Stationary, fixed jump
So, the first jump we'll add is very basic. When we press the jump button, the player cannot move horizontally and is simply teleported a bit into the air and then teleported back down after a short time. To me this is reminiscent of something like Game & Watch: Donkey Kong Jr. (see below video) although even a bit simpler.
This level (and the next one) are simple in a quite useful way; you don't need to calculate any collision. By not allowing the player to move horizontally while they're jumping, you know that there will be no collisions as long as the player returns to the spot they jumped from.
To start this level, add the following variables to the 'Create' event:
jump_stationary = 0;         // How long has the player been jumping
jump_stationary_max = 60;    // How long until the player should fall
jump_stationary_height = 32; // Distance to be telported up
The basic concept is that after the jump key has been pressed and the player has been teleported into the air (by the distance defined by jump_stationary_height), jump_stationary (representing a timer) will tick down from 60 to 0 each frame and then teleport the player back down to the ground.
The code in the 'Step' event will look like this:
if jump_stationary == 0
{
    if keyboard_check_pressed(vk_up)
    {
        y -= jump_stationary_height;
        jump_stationary = jump_stationary_max;
    }
}
else
{
    hsp = 0;
    jump_stationary--;

    if jump_stationary == 1
    {
        y += jump_stationary_height;
    }
}

// Collision code here...
When jump_stationary == 0, that's our default, on-the-ground state. When that is the case, we're checking for the up-arrow key to be pressed and then moving the player upwards as well as setting the jump_stationary timer.
Then, when jump_stationary is not equal to 0, we want to stop the horizontal movement by setting hsp to 0. We also need to decrement the jump_stationary variable and, when it is equal to 1 (i.e. the last frame before we should be back on the ground), the player is teleported back down.
You'll notice the absence of any vertical collision checking. This means that if we walk underneath a block, we can jump through it. However, since our jump always returns us to the same spot, we never get permanently stuck. In the next level, we'll fix that.
2. Stationary, smooth jump
The next level up is to not make that jump look so jarring. Instead of teleporting up, we'll slowly slide up and down. This still won't look natural but it has a certain charm. The code for this level is mostly the same as the previous level.
//if jump_stationary == 0
//{
//  if keyboard_check_pressed(vk_up)
    and !place_meeting(x, y - jump_stationary_height, obj_collision)
//  {
        jump_stationary = jump_stationary_max;
//  }
//}
//else
//{
// hsp = 0;
//
    if jump_stationary > jump_stationary_max / 2
    {
        y -= 2;
    }
    else
    {
        y += 2;
    }

    jump_stationary--;
//}

// Collision

// if place_meeting(x + hsp, y, obj_collision)
//{
//    while !place_meeting(x+sign(hsp),y, obj_collision)
//    {
//        x += sign(hsp);
//    }
//    hsp = 0;
//}
//x += hsp;
The first thing to notice is the addition of this line:
and !place_meeting(x, y - jump_stationary_height, obj_collision)
This checks if there's a wall above us and won't let us jump if there is.
You'll also notice that we don't teleport the player up immediately. Instead, while we are jumping, we check if the jump_stationary timer is greater than half of the maximum value of the timer. This represents the time when we are in the first half of the jump.
If this is the case, we need to move upwards. I used the value of 2 as the speed to travel upwards but you can choose whatever you want. If the timer is less than or equal to half of its maximum value then we should reverse this upwards movement. Finally, decrement the timer.
3. Simple physics
Gravity is a force that is always acting on us (unless any astronauts are reading this tutorial) so it's natural to want to implement that in your game.
For this level, we need to add three variables:
vsp = 0;    // Current vertical velocity
jspd = 5;   // Jump strength
grav = 0.3; // Gravity
This system mostly builds off of the way horizontal movement and collision was shown to work earlier but a constant gravity force is applied downwards on the player and upwards force is only applied in a burst when the up-arrow key is pressed. The code looks like this:
vsp += grav;

if keyboard_check_pressed(vk_up) and place_meeting(x, y + 1, obj_collision)
{
    vsp = -jspd;
}

// Collision

//if place_meeting(x + hsp, y, obj_collision)
//{
//    while !place_meeting(x+sign(hsp),y, obj_collision)
//    {
//        x += sign(hsp);
//    }
//    hsp = 0;
//}
//x += hsp;

if place_meeting(x, y + vsp, obj_collision)
{
    while !place_meeting(x, y + sign(vsp), obj_collision)
    {
        y += sign(vsp);
    }
    vsp = 0;
}
y += vsp;
First, we add grav to vsp. Then, we check if the up-arrow key has been pressed and if we're on the ground. If so, we set our vertical velocity to our jump strength.
At the end, we need to add some code to handle vertical collisions. This looks similar to the horizontal collision code but obviously checking y instead of x and vsp instead of hsp.
A technical detail worth pointing out is the structure of our if statements.
if keyboard_check_pressed(vk_up) and place_meeting(x, y + 1, obj_collision)
Notice how in this line, the input check is placed before the collision check. This is because if the first check is false, GameMaker won't bother processing the second check. So, because it's less costly to check input than collision, it makes sense to only run the collision check if we absolutely have to.
Design-wise this is the first big change we've made. Allowing the player to move horizontally and vertically at the same time gives the player a lot of freedom to traverse your levels. Now, this can obviously be great but it may also not be the vibe you're going for in certain cases.
4. Coyote time and input buffering
Coyote time and input buffering are two examples of subtle tricks we can implement in order to give the player the feeling that the game is respecting their input.
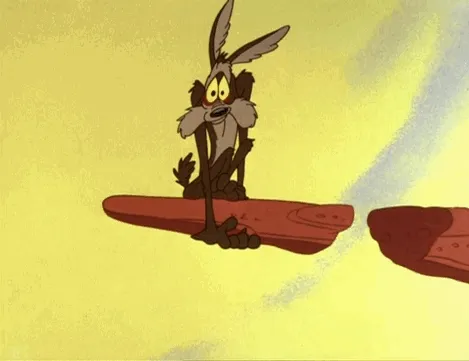
First, coyote time (named after the period of time where Wile E. Coyote (pictured above) hangs in the air before falling) refers to a short period where the player has stopped standing on the ground but the game will still let them jump.
Second, input buffering refers to the act of remembering that the jump button was pressed for a few frames after it actually was. This means that if the player hits the jump button a few frames before they actually land on the ground, when they do, the game will remember that they wanted to jump and then it will execute the jump.
In a strict sense, these mechanics actually break the rules of the game by allowing the player to jump when they're not on the ground. However, by making the window of time where that rule can be broken very small, the actual effect is that the player feels that the game is more responsive to their input.
So, to get started coding these features. Add the following variables:
coyote_time_max = 10;          // How many frames the player can be in the air for and stil jump
coyote_time = coyote_time_max; // The timer for our coyote time

buffer = 10;                   // How many frames we can hit the jump button before hitting the ground
key_jump = 0;                  // = 10 when the jump key is pressed, = 0 when we can no longer jump
Then change the 'Step' event to look like this:
if keyboard_check_pressed(vk_up) key_jump = buffer;
if key_jump > 0 key_jump--;

// Jump

//vsp += grav;

if place_meeting(x, y + 1, obj_collision)
{
    if coyote_time < coyote_time_max
    {
        coyote_time = coyote_time_max;
    }
}
else if coyote_time > 0
{
    coyote_time--;
}

if key_jump > 0 and coyote_time > 0
//{
//    vsp = -jspd;
    key_jump = 0;
//}

// Collision code here...
Leave all of the collision code from the previous code and just make changes above that. The first step is to check if the up-arrow key was pressed, and if it was, set the key_jump variable to the buffer variable. In effect, this starts the timer for how input buffering. Then to count down the timer, just check if key_jump > 0 and decrement the key_jump variable.
Next, check if we're on the ground and if so, set the coyote_time variable to coyote_time_max. If the player is not on the ground and coyote_time > 0, decrement it. Both of these bits of code are just very simple timers which tell is whether we've recently pressed the up-arrow key or recently left the ground.
Then, check that both of these are true by writing if key_jump > 0 and coyote_time > 0 and execute the jump. The actual jump code is the same (vsp = -jspd) but we also have to set key_jump to 0 here so that the game knows that the jump has been performed.
5. Variable jump height

This level is not the flashiest but it can completely change how a game feels to play. Variable jump height allows the player to perform different strength jumps depending on how long the jump button is pressed. For example, if you just quickly tap the jump button, you'll perform a very short jump. But if you hold the jump button, you'll jump a lot higher. This feature is present in iconic games such as Super Mario Bros but I really like the impact it has on a game like Hollow Knight where it allows you to simultaneously have very tight movement controls for platforming sections as well as really large jumps for exploration sections.
To implement this feature, just add one variable to the 'Create' event:
jump_decay = 0.8; // 1 = no variable jump height, lower number = smaller jumps
For the 'Step' event, simply add these four lines of code before the collision code.
if vsp < 0 and !keyboard_check(vk_up)
{
    vsp *= jump_decay;
}
What these lines do is check if vsp < 0 (i.e. the player is travelling upwards) and the up-arrow key is not pressed. If both of these conditions are true, the current vertical velocity will be multiplied by the delay variable. This means that if you're jumping and not pressing the up-arrow key, your vertical velocity will decrease. If you hold the up-arrow key the entire duration of the jump though, you'll get the full height of the jump.
6. Bounce pads and jump types
In theory, bounce pads are a simple feature; just add some vertical velocity if the player collides with a bounce pad object. But if we just add a little complexity, we can make this system a lot more versatile. By introducing the concept of 'jump types' we can support different functionality for jumping off of different surfaces down the road. While for this tutorial I'm only adding bounce pads, in the future you could add support for very small jumps when jumping off of sticky mud.
To support this, add the following code in our 'Create' event:
enum jump_types
{
    NORMAL,
    BOUNCE
}

jump_type = jump_types.NORMAL;
If you haven't used enumerators before, they're a great way of representing a finite list of options. For example, we know that there are two types of jumps: normal and bounce. So we could say a normal jump has an ID of 0 and a bounce jump has an ID of 1. That would work but it would make our code less readable because then we would have to write things like if jump_type == 0.
Instead, we use an enumerator which lets us refer to jump_types.NORMAL in the code, while GameMaker reads that as a 0. Sure, you could use strings instead (i.e. if jump_type == "normal") but if you accidentally typed "Normal" or "nomal" instead of "normal", your code would stop working at it might be harder to debug. With enumerators, as soon as you type jump_types, GameMaker will suggest NORMAL and BOUNCE as your two options.
We can also define a method which is simply a block of code which can be called from elsewhere in your code without repeating yourself. To start, write add the following code in the 'Create' event:
jump = function(_multiplier)
{
    vsp = -jspd * _multiplier;
    key_jump = 0;
}
The benefit of doing this is that we don't have to repeat the jump code in our check for collisions with bounce pads or collisions with walls.
To make this even more useful, the method takes a number as an argument which represents the vertical velocity multiplier. That means that jump(1) will execute a standard jump but jump(2) will execute a x2 height jump.
Moving onto the 'Step' event, make these changes:
//if keyboard_check_pressed(vk_up) key_jump = buffer;
//if key_jump > 0 key_jump--;

// Jump

//vsp += grav;

//if place_meeting(x, y + 1, obj_collision)
//{
    var _inst = instance_place(x, y + 1, obj_collision);

    //if coyote_time < coyote_time_max
    //{
    //	coyote_time = coyote_time_max;
    //}

    if _inst.object_index == obj_bounce
    {
        jump(1.5);
        jump_type = jump_types.BOUNCE;
    }
    else if _inst.object_index == obj_wall
    {
        jump_type = jump_types.NORMAL;
    }
}
//else if coyote_time > 0
//{
//    coyote_time--;
//}

if jump_type = jump_types.NORMAL
{
    if key_jump > 0 and coyote_time > 0
    {
        jump(1);
    }

    if vsp < 0 and !keyboard_check(vk_up)
    {
        vsp *= jump_decay;
    }
}

// Collision code here...
The first thing to notice is the addition of a reference to the object the player is standing on. Inside the place_meeting function, initialize a local variable called _inst which will store a reference to the object the player is colliding with. Then, check if the object_index of that object is obj_bounce and if so perform a 150% jump and set the jump_type to jump_types.BOUNCE.
Otherwise, if the object is a wall, just set the jump type to jump_types.NORMAL. This basically means that now whenever the player is standing on top of an object, the game knows what it is.
The last thing to do is change the previous jump code to the jump() method and wrap all of the previous jump code in the check if jump_type = jump_types.NORMAL. The reason for the check is because we don't want to be able to perform a normal jump or run the variable jump height code if the player is on a bounce pad.
If you wanted bounce pads to also have variable jump heights, you could move that code outside of the if statement.
7. Double jump
The double jump is a staple feature of platformers and not too hard to implement. However, when adding it, consider if you actually need a double jump, or you just want the player to be able to jump higher.
The only difference between a double jump and a high jump is that with a double jump the player can time when they want the extra height and they can jump in a different direction. So to make the most out of your double jump, you need to design levels which take advantage of those differences.
In the 'Create' event, add these variables:
jump_capacity_max = 2;             // How many jumps we have when we're on the ground
jump_capacity = jump_capacity_max; // How many jumps we have currently
At this stage, if you want a triple jump, replace 2 with 3. If you want infinite jumps, replace 2 with the word infinity (yes, it's that simple).
The 'Step' event will look like this:
//if keyboard_check_pressed(vk_up) key_jump = buffer;
//if key_jump > 0 key_jump--;

// Jump

//vsp += grav;

//if place_meeting(x, y + 1, obj_collision)
//{
//  var _inst = instance_place(x, y + 1, obj_collision);

//  if coyote_time < coyote_time_max
//  {
//      coyote_time = coyote_time_max;
//  }
//
    if jump_capacity < jump_capacity_max
    {
        jump_capacity = jump_capacity_max;
    }
//
//  if _inst.object_index == obj_bounce
//  {
//      jump(1.5);
//
//      jump_type = jump_types.BOUNCE;
//  }
//  else if _inst.object_index == obj_wall
//  {
//      jump_type = jump_types.NORMAL;
//  }
//}
//else if coyote_time > 0
//{
//  coyote_time--;
//}

var _can_jump = (coyote_time > 0 and jump_type == jump_types.NORMAL) or jump_capacity > 0;

if key_jump > 0 and _can_jump
{
    jump(1);

    if jump_type != jump_types.NORMAL
    {
        jump_type = jump_types.NORMAL;
    }
}

if jump_type == jump_types.NORMAL and vsp < 0 and !keyboard_check(vk_up)
{
    vsp *= jump_decay;
}

// Collision code here...
Inside the jump() method, add the line jump_capacity-- which will take away one of our jumps as needed.
Then, the code inside the place_meeting check is mostly the same apart from the fact that - just like for coyote time - you need to set jump capacity to the max if we're standing on the ground.
Next, initialize a local variable called _can_jump. This is true when the player is capable of performing a normal jump (i.e. on the ground) or still has jump capacity. Then, check if the up-arrow key has been pressed and if the player can jump. If so, perform a normal jump. Then, if the player double jumped out of a bounce pad jump (i.e. jump_type != jump_types.NORMAL) then reset it back to NORMAL so that the double jump is affected by variable jump height again.
Finally, just add the check jump_type == jump_types.NORMAL to the variable jump height code since the re-jigged code doesn't already check that like in the last level.
8. Wall climb
The wall jump is another classic feature but there are two variations. The first - the wall climb - is what we're covering in this level. The wall climb is where you simply perform a normal jump if you're pressed against a wall. This is different to the wall jump which pushes you horizontally away from the wall.
Celeste is an example of a wall climb (and it fits the theming of a mountain climbing game) whereas Super Meat Boy is an example of a wall jump.
To implement the wall climb, just above the _can_jump variable, initialize a _wall_jump variable. It will look like this:
var _wall_jump = place_meeting(x + 1, y, obj_wall) or place_meeting(x - 1, y, obj_wall);
var _can_jump = (coyote_time > 0 and jump_type == jump_types.NORMAL) or jump_capacity > 0 or _wall_jump;
_wall_jump just checks if there's a wall to the left or right of a player. Then notice I've added that variable as an optional condition to our _can_jump variable. Now, the player can either jump from the ground, in mid-air if we have a double jump, or off of a wall.
The last thing to change is just after the line that reads jump(1);. There you need to write:
if _wall_jump jump_capacity++;
This line makes sure that you don't take away from the double jump ability if we've performed a wall climb.
9. Wall jump
For the wall jump, we have to add a few more variables. With all of the variables we've created (but especially for this level), tweaking the values can alter the feel of the game drastically.
Add the following variables:
wall_jump_spd = 6;         // Horizontal force to apply away from wall
wall_jump_dir = 0;         // Direction to apply horizontal force
wall_jump_freeze = 0;      // How long we can't move towards the wall
wall_jump_freeze_max = 20; // Maximum time we can't move towards the wall
Regarding changing the feel of the game, changing the first variable will alter how far the player will get pushed from the wall. But the 'freeze' variables add another "dial" we can use to control the movement by stopping the player from moving back towards the wall during the wall jump.
This means that, if we choose, we can stop the player from climbing up a wall by just wall jumping without having to make the horizontal force crazy strong.
Not only do these choices affect the feel of the game, they also affect what is possible for the player to do and how you construct your levels. If you want the player to be able to scale walls, make wall_jump_spd and wall_jump_freeze_max smaller. If you don't, make them bigger.
Moving on to the 'Step' event, everything is the same up until the point when we initialize the _wall_jump local variable.
var _wall_jump = 0;
if place_meeting(x + 1, y, obj_wall) _wall_jump = 1;
else if place_meeting(x - 1, y, obj_wall) _wall_jump = -1;

var _can_jump = (coyote_time > 0 and jump_type == jump_types.NORMAL) or jump_capacity > 0 or _wall_jump != 0;

//if key_jump > 0 and _can_jump
//{
//  jump(1);
//
    if _wall_jump != 0 and !place_meeting(x, y + 1, obj_collision)
    {
        jump_capacity++;

        wall_jump_dir = _wall_jump;
        wall_jump_freeze = wall_jump_freeze_max;

        hsp = wall_jump_spd * -wall_jump_dir;
    }
//
//  if jump_type != jump_types.NORMAL
//  {
//      jump_type = jump_types.NORMAL;
//  }
//}

//if jump_type == jump_types.NORMAL and vsp < 0 and !keyboard_check(vk_up)
//{
//  vsp *= jump_decay;
//}

// Collision code here...
Instead of just setting _wall_jump to true or false, set it to the direction in which the player is touching the wall. Then, when initializing _can_jump, make sure the check is _wall_jump != 0 instead of just _wall_jump being true or false.
The same goes for the line if _wall_jump inside of the if key_jump > 0 and _can_jump section, change that to if _wall_jump != 0 and !place_meeting(x, y + 1, obj_collision). This checks if the player is touching a wall and is not on the ground.
Then, just as before, incrementi jump_capacity because we don't our wall jump to count as a double jump. But here we also need to set the wall_jump_dir variable to the local variable _wall_jump. This allows the game to remember what direction the wall jump is facing and won't allow the player to move towards the wall for a few frames.
Next, set wall_jump_freeze to wall_jump_freeze_max and set hsp (our current horizontal velocity) to wall_jump_spd * -wall_jump_dir which will push the player away from the wall.
Finally, go back to the start of your 'Step' event and just after the line move = _right - _left; add in this code:
if wall_jump_freeze > 0
{
    if move == wall_jump_dir move = 0;

    wall_jump_freeze--;
}
This code processes the wall_jump_freeze timer and cancels our movement if the direction we want to move in is towards the wall we just jumped off of.
10. Visual juice
This final level could contain a lot of detail about animations, particles, and post-processing effects but I'll just focus on a few tricks which lie within the realm of programmer art. Earlier, I discussed the importance of making the player feel like the game is respecting their input. Part of the role of visual juice is to do exactly this and provide feedback to the player about their input. Again, how far you go with juice is a matter of design and games with fewer flashy effects aren't automatically worse.
The great part is that these effects are very easy to code. To start, add the following variable to your player's 'Create' event:
xscale = 1; // Represents the player's horizontal scale without affecting collisions
Now in the 'Step' event, just add these few things.
In the jump() method, add the line xscale = 0.5;. This will squish the player's horizontal scale whenever they jump to give some feedback to the player.
Then, inside the if place_meeting(x, y + 1, obj_collision) section, next to the line coyote_time = coyote_time_max;, set xscale to 1.5 (or any value greater than 1 you like). This will stretch the player's horizontal scale whenever they land on the floor and create a nice effect representing the impact of hitting the floor.
Next to the line jump(1.5); write _inst.image_yscale = 0;. This will squish the bounce pad down when you land on it which is a neat effect. To make the bounce pad come back up though, you'll have to add a 'Step' event to the bounce pad object and add this line image_yscale = lerp(image_yscale, 1, 0.1);.
However, returning to the player object, add a normal 'Draw' event to your player object and type the following:
/// @desc Draw self

if x - xprevious != 0 image_xscale = sign(x - xprevious);

draw_sprite_ext(sprite_index, image_index, x, y, image_xscale * xscale - abs(vsp) / 50, image_yscale, -hsp * 2, image_blend, image_alpha);

xscale = lerp(xscale, 1, 0.1);
With that done, some explanation. The first line is a simple way of making the sprite face the direction in which the player is moving. xprevious is a built-in GameMaker variable which tracks the previous x value of that object.
So, if the player is currently at x-position 1 and their previous x-position was 0, then x - xprevious will be 1. If the result is positive, then the sprite should face right. If the result is negative, the sprite should face left.
We check that it's not equal to 0 because we don't want to set the horizontal scale of our sprite to 0 otherwise it would disappear. If it's not zero, then we can set imgae_xscale (the horizontal scale of the sprite) to the signed result. The sign function just converts positive numbers to the number 1 and negative values to the number -1.
Now for the second line. The function draw_sprite_ext is useful as we're not changing the actual scale or rotation of the player, we're just drawing the sprite differently. This means that we're not messing with the collision shape of the player at all.
The first trick is to squish the player's horizontal scale when their vertical velocity is high. This adds some nice feedback to the player's vertical movement and makes every jump feel more dynamic.
To do this, take image_xscale, multiply it by our own custom xscale value (which we set in the Step event), and then take away a value. That value is going to be abs(vsp) / 50. Breaking that down, abs(vsp) represents the speed in which we are travelling vertically. The abs function is there to turn vsp into a positive number if it's negative. We do that because we don't care whether vsp is negative or positive in this situation.
We divide it by 50 just as a simple way of making the number smaller. 50 is another arbitrary value and a smaller number would make the effect more dramatic while a bigger number would make the effect more subtle. You just probably don't want the result of image_xscale * xscale - abs(vsp) / 50 to be less than or equal to 0 because it would look quite weird for the player sprite to either disappear or flip around.
The second trick is leaning the player towards the direction of movement.
This can make even programmer art look quite dynamic. Where draw_sprite_ext accepts the rotation of the sprite as an argument (just after image_yscale), type -hsp * 2. This just takes our horizontal velocity multiplied by 2 as the rotation of our player.
The negative sign affects the direction of the rotation so if you wanted the player to rotate away from the direction of movement you should remove the negative sign. Likewise, the number 2 is arbitrary and increasing it would make the rotation stronger while changing it to 0 would remove any rotation. Because our horizontal movement is already smooth, linking rotation to the horizontal velocity results in smooth rotation as well.
The last step is to just use the lerp function to smoothly set the player's horizontal scale back to 1.
11. Bonus level (SFX)
Because we all know how scope creep can be, I want to teach you how to add some simple sound effects even though it wasn't in the original plan. I made 2 sound effects in the free SFX maker Bfxr and you can download them from here: snd_jump and snd_land.
Then in GameMaker, right click the 'Sounds' folder in the 'Asset Browser' and select 'Sound' from the 'Create' sub-menu. Name your sound (I went for 'snd_jump' and 'snd_land') and then select the sound files by clicking the '...' button to the right of the name.
Now, go to the 'Step' event in the player object and inside the jump() method add this line:
audio_play_sound(snd_jump, 10, false);
Then, next to the line coyote_time = coyote_time_max add this line:
audio_play_sound(snd_land, 10, false);
That should be all you need for a few basic sounds. If you'd like, think about adding in a different sound effect for the bounce pads (or even just change the pitch of the existing sound effect using the velocity multiplier).
12. Conclusion
If you've been following along with this tutorial and coding, thank you for reading and hopefully you have a good understanding of how to code a basic jump as well as a complex one. Remember that it's up to you to create the perfect jump for your game.
Also, there's plenty of aspects of my code which aren't the perfect way of doing things but for the purposes of a tutorial I need to keep things simple. Your game will inevitably need a jump which is custom in some way and at that point you can pick and choose which aspects of the jump to add more complexity to.
For more GameMaker tutorials, please check out my YouTube channel.